A simple Photoshop action tutorial to add a text watermark to your artwork. This should work on pretty much any PS version. My version is PS CS6.
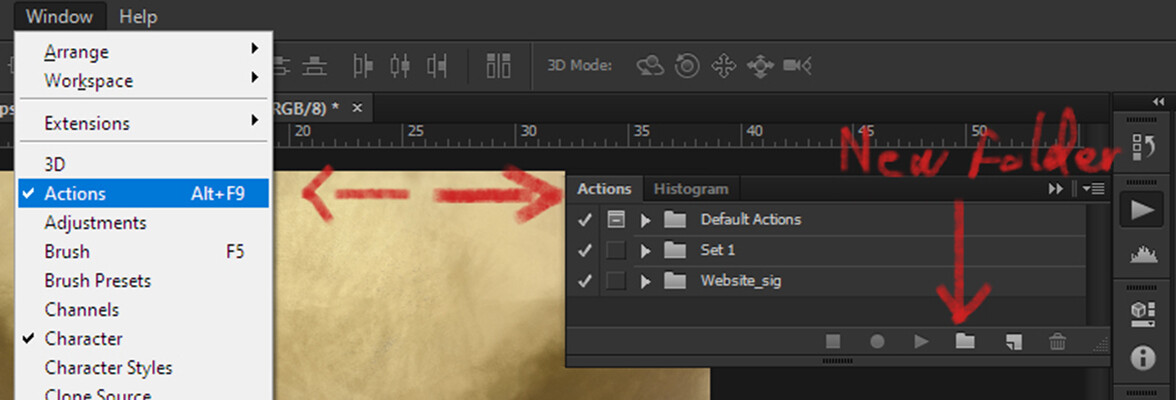
Find Actions under the Window menu or press Alt + F9 and press the folder button in the Actions window.

Rename your new folder set as desired. Keep your actions lists organized.
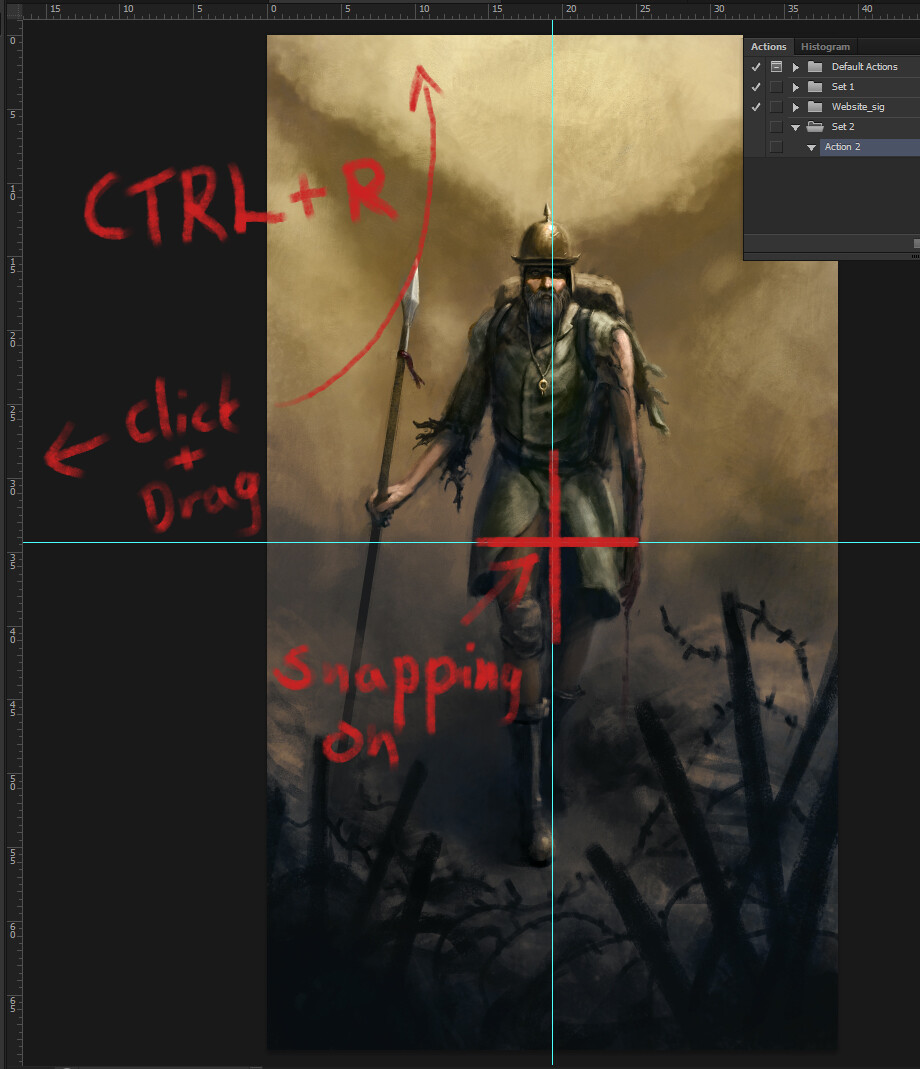
Now we need to find the perfect centre point in the image (You can skip this part if newer PS versions align layers without using a second layer as a guide). Press ctrl + R to get the rulers around your image. Click and hold inside the ruler and drag. You should see a light blue line emerge. with Snapping enabled (under view menu Snap & Snap to) drag it to the middle of your image. Repeat for horizontal/vertical line.
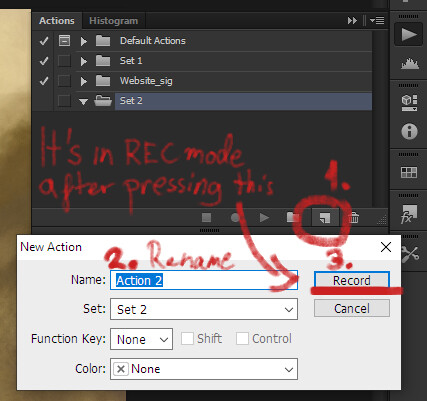
Back to the Actions window. Press the "New action" button, rename the action and hit Record. Note that every action from now on is recorded. You can simply delete any accidental actions but keep your eye on here to see if there's more actions than there should be.
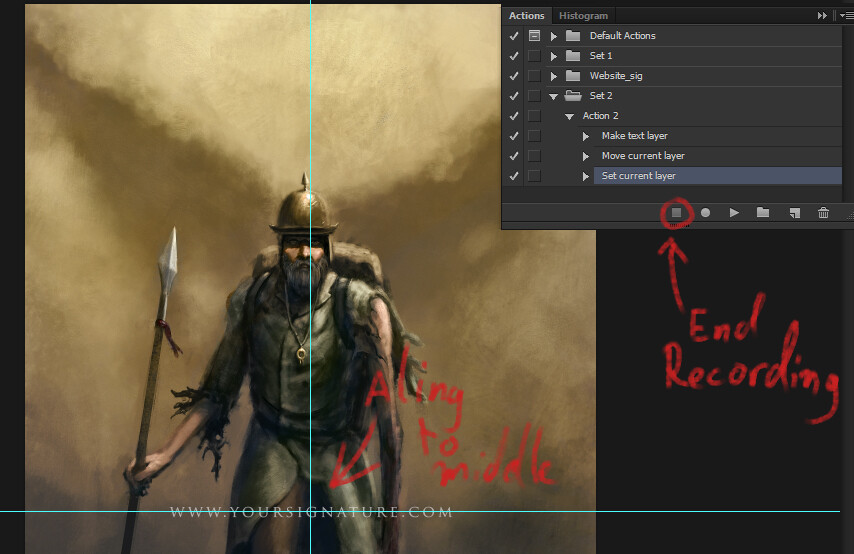
Select the Text tool and type in your watermark with the desired font and look. You might want to design your watermark before doing this step so you don't end up with unnecessary actions in the list. The font style and look is saved in the action, so no need to fiddle with the look at this point.
After you've typed your watermark, grab the move tool and align the text to the middle. It should snap in place if you enabled the Snapping under view settings.
This is also a point to do any blending mode or opacity changes or layer styles if you want.
End the recording by pressing the "stop" button.

Now select your action from the top of the list and press the play button to your hearts content and create as many watermark text layers as you want. As we went the trouble to align the text smack in the middle, it will always be generated in the middle of any image and not out of bounds.
Lemme know if you found this useful and if any part is confusing :)